


Ensuring online account security is of utmost importance in today's world, especially when it comes to professional networks like LinkedIn. As we actively utilize LinkedIn for our business projects, giving due attention to the security of storing and using our accounts is essential.
In this article, we will explore an example of using the Dolphin browser to automate actions on LinkedIn and provide valuable tips on maintaining account security.
What is the Dolphin browser and its functionalities?
The Dolphin browser is a popular mobile browser offering a wide range of features and settings for convenient and secure internet surfing. With its assistance, you can not only browse web pages but also automate certain actions on the LinkedIn platform.
Installation
This browser offers the possibility to automate certain routine actions on LinkedIn, such as:
- Finding and adding new contacts
- Sending invitations
- Commenting and liking posts, etc.
To do this, you need to set up specific scripts or extensions that will allow you to perform the desired actions automatically.
— Follow the link to download the Dolphin browser to your computer. Please note that on this page, you can choose the version for your platform (Windows, MacOS, Linux).
— Once the download is complete, run the installation file and follow the instructions provided to install the browser on your computer.
— After installation, open the Dolphin browser and proceed with the registration process. Click on the "Sign Up" button to create a new account.
— Fill in the required fields of the registration form, including your email address and password. Make sure to use a strong password that consists of a combination of letters, numbers, and special characters.
— When registration is complete, log in using your account credentials.
— After logging into the Dolphin browser, you may be prompted to select a pricing plan. If necessary, choose the appropriate plan that suits your requirements. Paid plans usually offer higher functionality and more features compared to the free version.
— If you choose the free version, you will have the ability to store up to 10 profiles and connect only one user. If you need to use more profiles and add additional users, consider upgrading to a paid plan.
Setting up your account in the Dolphin browser
After installation and registration in the Dolphin browser, we proceed to configure our account to ensure that all parameters meet our needs and security requirements.
In the left menu of the browser, we can see various icons:
1. Browsers:
In the "Browsers" menu, we can view a list of all connected profiles and their main parameters. Here, we can add, remove, and edit profiles, as well as view information about the number of connections and other settings.
2. Proxies:
The "Proxies" menu allows us to add, remove, and test proxy servers. This is important to protect our accounts and ensure anonymity while working with LinkedIn. We recommend using proxies for each account to avoid blocking or restrictions.
3. Scripts:
In the "Scripts" menu, we can manage scripts - sets of actions that can be automated on LinkedIn. Scripts allow us to perform repetitive tasks, such as sending invitations or commenting on posts, without having to do them manually.
4. Bookmarks:
The "Bookmarks" menu allows us to add and manage bookmarks for convenient access to specific pages or profiles on LinkedIn.
5. Extensions:
Like any other browser, Dolphin allows us to download extensions for enhanced functionality. Here, we can add extensions for all profiles and use them in our work with LinkedIn.
6. Users:
In the "Users" menu, we can manage users, especially if we have a large team. Here, we can grant each user access only to their own accounts without access to others.
7. API:
If you have programming skills, you can refer to the Dolphin API documentation to automate tasks on LinkedIn to the fullest extent.
8. Automation:
This is the reference information for automation within Dolphin. It is intended for experienced users and requires programming skills.
9. Settings:
In the "Settings" menu, we can manage various parameters, such as tokens, statuses, and start pages for profiles.
10. Logout:
The "Logout" menu allows us to safely sign out of the account.
Adding LinkedIn profiles to the browser
First, decide whether you will use proxy servers for your LinkedIn accounts. If so, go to the "Proxies" tab in the browser menu.
In the upper right corner, you will see the 'plus' icon:
. Click on it to proceed with adding proxies.
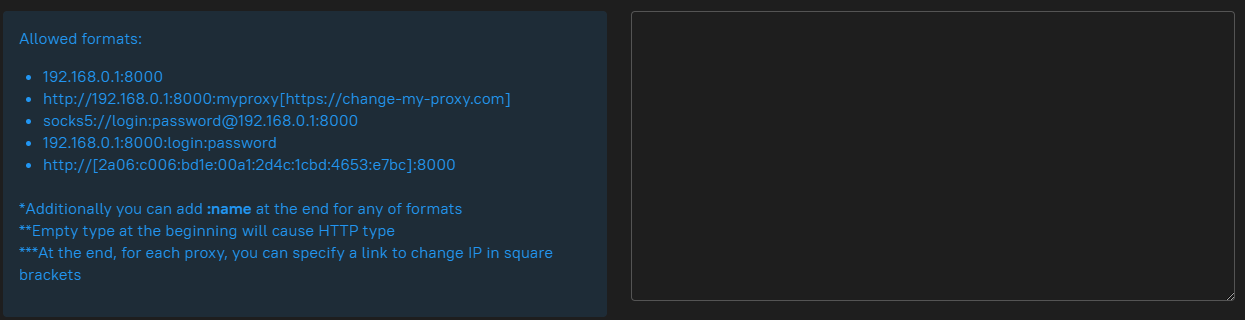
On the left side, you will find a hint on how to add proxies. On the right side, there is an input field where you can enter the data in the format ip:port:login:password:name, where name is the name of the proxy for your convenience. If you have regular IPv4 proxy servers with HTTP/SOCKS5 without rotation, it is recommended to use this format.
After adding all the proxy servers, switch to the "Browsers" tab and click on the same icon "+" in the upper right corner. This will open the profile settings menu.
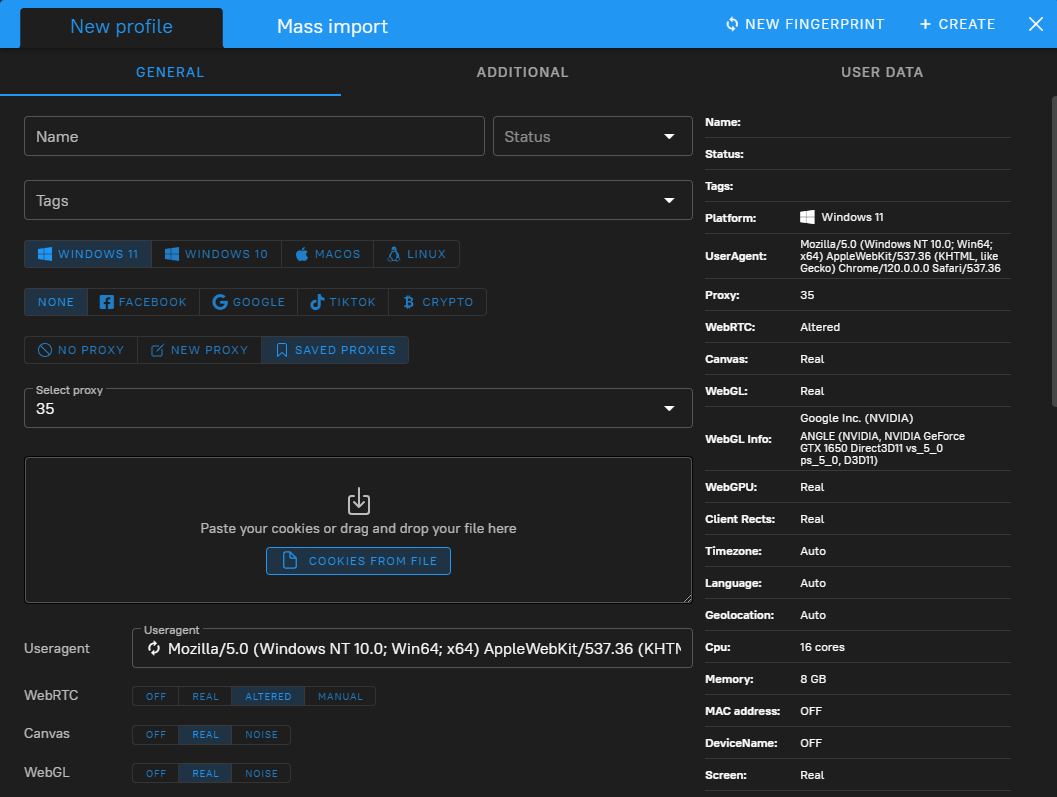
In the profile settings menu on the right, you will see fingerprints that each site will receive when you interact with them.
Fill in the following details:
— Name: give a name to your account.
— Status: add a status that you previously added in the settings section.
— Tags: add tags for ease of classification.
— Platform: select the platform you will be interacting with. This does not affect functionality; it simply shows the sites the platform you are accessing from.
Then, select "Save proxy" and choose the desired proxy server.
Scroll down and you will see many other parameters.
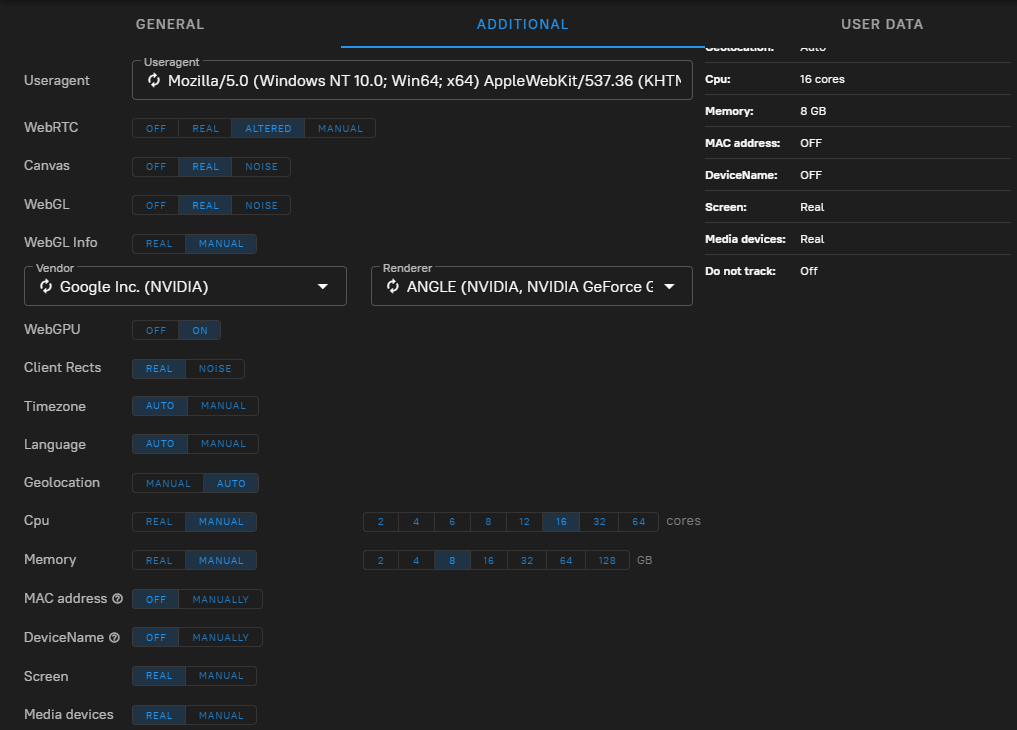
You can leave them unchanged to maximize hiding your fingerprints from sites. One parameter you can modify is the "Language" according to your preference, so that the sites are displayed in your desired language. After completing all the LinkedIn profile settings in the Dolphin browser, simply click the 'create' button.
You will then be redirected to the main screen where you can see all your profiles and manage them. Next to each profile, there is a three-dots icon, which opens the settings for the selected profile:
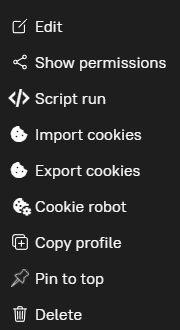
1) Edit: allows you to edit the profile settings and go back to the previous step.
2) Show permissions: allows you to manage user permissions for this profile. You can transfer the account to another user or reclaim it.
3) Script run: enables you to run a script that was previously created in the "Scripts" tab.
4) Import/Export cookies: allows you to import or export cookie files for this profile. This can be useful if you want to save specific settings or transfer the account to another device.
5) Copy profile: allows you to create a copy of the profile with the same settings.
6) Pin to top: allows you to pin this profile to the top of the list for quick access and convenience.
7) Delete: deletes the selected profile. Please note that deleting a profile will also delete all associated data, including scripts and cookies.
With these settings, you will have full control over your LinkedIn profiles in the Dolphin browser and be able to conveniently manage each profile according to your preferences.
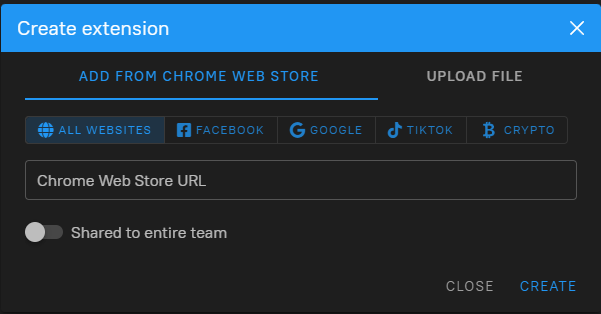
About extensions
On the "Extensions" tab, we can add extensions from the Google Web Store for enhanced functionality in the Dolphin browser. In the upper right corner, we find the icon "+". After clicking on it, paste the extension link and toggle the corresponding switch to the right to make the extension available for the entire team, not just for us.
About users
To add a new user, go to the "Users" tab. Click on the "+" icon, enter the user's details, including name, email address, generate (or create) a password, and select the user's role.
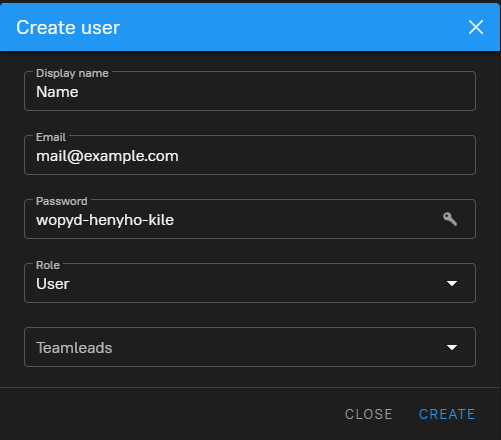
What are the roles available?
— User: a regular user without administrative privileges. Custom user roles, such as team leads, can also be set up.
— Team lead: a team leader who has the ability to configure users and modify their access rights.
— Admin: has full access rights to all features and settings.
Settings menu
In the "Settings" section, we can add statuses that will be displayed in LinkedIn profiles. To do this, click on the "+" icon. Additionally, in the settings menu, we can configure the startup pages that will open when launching the Dolphin browser for the first time.
Final thoughts
With the Dolphin browser, we can not only securely store and use our LinkedIn accounts but also customize various settings, add extensions, and manage users. This provides us with greater flexibility and efficiency in working with LinkedIn.
Protect your accounts and enjoy the automation capabilities and convenience provided by the Dolphin browser.
Yours, Peoplr.


